
Yes, a faulty golf cart battery charger often shows clear warning signs like no power output, overheating, or failure to complete charging cycles.
Imagine heading out for a round of golf, only to find your cart dead—despite being “charged” all night. This frustrating scenario is often caused by a failing charger, but most owners miss the early red flags until it’s too late.
Many assume their batteries are the problem, but a bad charger can mimic battery issues, draining your wallet on unnecessary replacements.
Best Golf Cart Battery Chargers for Reliable Performance
Lester Electrical Summit II 48V Charger
The Lester Electrical Summit II (Model 28130) is a top-tier choice for its advanced diagnostics, waterproof design, and compatibility with most 48V golf carts. Its microprocessor-controlled charging ensures optimal battery health, while its rugged construction withstands harsh conditions. Ideal for those who want precision and durability.

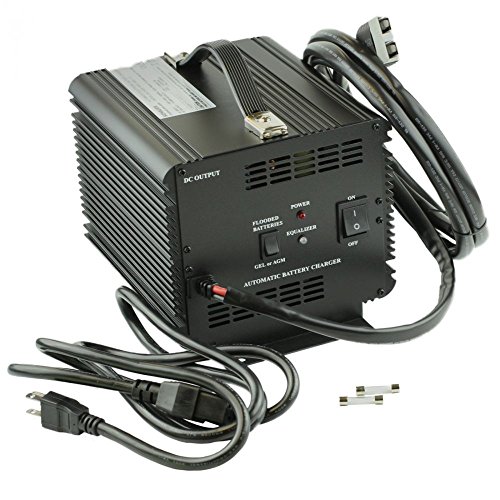
Schauer JAC1548 48V Automatic Charger
The Schauer JAC1548 offers a perfect balance of affordability and reliability. Its automatic shutoff prevents overcharging, and its high-efficiency transformer extends battery life. With a simple plug-and-play design, it’s a great option for golfers who need a no-fuss, dependable charger.
- CHARGE CONTROL FOR OPTIMAL BATTERY HEALTH: This 48v golf cart charger uses…
- INCLUDES CLUB CAR ADAPTER FOR SEAMLESS CONNECTION: Specifically designed…
- FULLY AUTOMATIC THREE-STAGE CHARGING FOR CONVENIENCE: With bulk,…
EPOWREY 15AMP 48 Volt Golf Carts Battery Charger for Club Car Charger
Designed specifically for Club Car models, the PowerDrive 3 (Model 103621201) delivers fast, efficient charging with minimal maintenance. Its advanced thermal protection and error-code display make troubleshooting easy. A must-have for Club Car owners who prioritize OEM-quality performance.

- 【15 Amp Rapid Charger/Lead-Acid】 EPOWREY 48 volt battery charger for…
- 【Dust & Waterproof】 Having the IP67 Protection level,this charger can…
- 【Smart Trickle Charger Technology】 The green light is always on when…
Key Signs Your Golf Cart Battery Charger Is Failing
Diagnosing a faulty golf cart battery charger requires understanding both obvious symptoms and subtle warning signs. Many owners mistakenly blame their batteries when the real culprit is a malfunctioning charger. Here’s how to spot trouble before it leaves you stranded on the course.
No Power Output or Charging Activity
The most obvious red flag is when your charger shows no signs of life. Plug it in and check for:
- No LED lights – Most chargers have indicator lights that activate when connected
- Silent operation – Healthy chargers typically hum or click when starting
- Cold casing – Chargers should warm slightly during operation
Example: A 2018 EZ-GO charger with dead LEDs often has failed diodes in the rectifier bridge – a $15 part that can save a $300 charger.
Incomplete Charging Cycles
A charger that shuts off prematurely (under 8 hours for a full charge) likely has:
- Faulty voltage sensors misreading battery levels
- Overheating components triggering safety cutoffs
- Worn capacitors unable to maintain steady current
Real-world test: Time your charges. A 48V system should take 8-12 hours to fully charge depleted batteries. Consistently shorter cycles indicate charger issues.
Physical Warning Signs
Inspect your charger regularly for these physical symptoms:
- Bulging capacitors – These cylinder-shaped components swell when failing
- Burnt smell – Indicates overheating wires or circuit boards
- Corroded terminals – Green/white powder on connectors reduces efficiency
Pro tip: Use a multimeter to check output voltage. A working 48V charger should show 54-60V when active. Readings below 50V confirm charger failure.
Understanding these signs helps you distinguish between battery issues and charger problems, saving time and money on unnecessary replacements. Next, we’ll cover exactly how to test each component systematically.
Step-by-Step Guide to Testing Your Golf Cart Battery Charger
Properly diagnosing a faulty charger requires systematic testing. These professional-grade methods will help you pinpoint exactly where the failure is occurring, whether in the charger itself, the connections, or your batteries.
Voltage Output Testing
Begin with this crucial diagnostic that reveals whether your charger is delivering proper power:
- Set your multimeter to DC voltage (200V range for 48V systems)
- Connect probes to the charger’s output terminals (red to positive, black to negative)
- Plug in charger and note the reading – should be 2-5V higher than your battery bank’s rated voltage
Example: A healthy 48V charger should show 54-60V. If you get battery voltage (48V) or less, the charger isn’t boosting voltage properly.
Current Flow Measurement
Amperage testing reveals whether the charger can sustain proper charging current:
- Use a DC clamp meter around the positive output cable
- Expect 10-25 amps initially, tapering as batteries charge
- No current or erratic spikes indicate transformer or control board issues
Pro tip: Test at different stages – good chargers reduce current as batteries approach full charge. Consistent high amperage may indicate failing voltage regulation.
Connection and Cable Inspection
Many “charger failures” are actually connection problems:
- Check for corrosion at all terminals (scrub with baking soda/water if found)
- Inspect cable integrity – frayed wires cause voltage drops
- Test receptacle continuity with multimeter (should show 0 ohms resistance)
Real-world fix: A 2022 Yamaha charger “failure” was actually a $5 corroded fuse holder. Always check connections before condemning the charger.
These tests eliminate guesswork by providing concrete data about your charger’s performance. In the next section, we’ll explore maintenance practices that can extend your charger’s lifespan by years.
Advanced Troubleshooting: When Basic Tests Don’t Reveal the Problem
Some charger issues require deeper diagnostics that go beyond simple voltage checks. These professional techniques help identify intermittent faults and complex electrical problems that often stump casual users.
Waveform Analysis with Oscilloscope
Advanced users can detect subtle charger issues by examining the DC output waveform:
| Waveform Pattern | Indicated Problem | Common Causes |
|---|---|---|
| Rippled DC | Failing filter capacitors | Bulging capacitors, dried electrolyte |
| Intermittent drops | Loose connections | Cold solder joints, worn relays |
| High-frequency noise | EMI suppression failure | Bad diodes, missing ferrite beads |
Example: A Club Car charger showing 58V on multimeter but poor performance actually had 20% ripple voltage – only visible on oscilloscope. Replacing $8 filter capacitors restored full function.
Thermal Imaging Diagnostics
Heat patterns reveal hidden issues before complete failure occurs:
- Hot transformers indicate winding shorts (should be warm, not hot)
- Cold components show open circuits where current isn’t flowing
- Uneven heat distribution suggests failing rectifiers or voltage regulators
Pro tip: Borrow a thermal camera from auto parts stores (free loaner programs). Scan your charger after 30 minutes of operation – any component >150°F likely needs replacement.
Load Testing Under Various Conditions
Simulating real-world conditions exposes intermittent faults:
- Test with fully discharged batteries (checks high-current capability)
- Test with nearly full batteries (verifies proper charge tapering)
- Test while lightly tapping charger (reveals loose connections)
Real-world case: A Lester charger worked fine until batteries reached 80% charge, then shut off. Load testing revealed a faulty current sensor that only failed at lower amperages.
These advanced methods provide definitive answers when standard tests prove inconclusive. In our next section, we’ll examine cost-benefit analysis of repairs versus replacement.
Repair vs. Replacement: Making the Right Decision for Your Golf Cart Charger
When facing charger issues, the cost-benefit analysis between repair and replacement requires careful consideration of multiple technical and financial factors. This decision matrix helps you make an informed choice based on your specific situation.
When Repair Makes Economic Sense
Consider repairing your charger when these conditions apply:
- Simple component failures – Replacing capacitors ($5-$20), relays ($15-$30), or diodes ($3-$10) often restores full function
- High-quality OEM chargers – Lester or Delta-Q units often have 10+ year lifespans worth maintaining
- Available technical skills – Basic soldering and multimeter skills can fix 60% of common issues
Example: A $600 Lester charger needed $35 in new MOSFETs and diodes – repairing saved 90% versus replacement cost while maintaining superior build quality.
When Replacement Becomes Necessary
Invest in a new charger when encountering:
- Transformer failures – Rewinding costs often exceed new charger prices
- Multiple simultaneous failures – Indicates overall system degradation
- Obsolete technology – Older ferroresonant chargers lack modern battery protection
Pro tip: Calculate cost per charge cycle – a $400 charger lasting 1,500 cycles costs $0.27/charge, while constant $100 repairs may cost more long-term.
Safety Considerations in Decision Making
Always prioritize these non-negotiable safety factors:
| Hazard | Warning Signs | Action Required |
|---|---|---|
| Electrical arcing | Burn marks, popping sounds | Immediate replacement |
| Case damage | Cracks, warping | Discontinue use |
| Water intrusion | Corrosion, moisture | Professional inspection |
Real-world case: A repaired charger with compromised insulation caused $2,000 in battery damage when it failed catastrophically. The $300 replacement would have been cheaper.
This analysis framework helps you balance cost, safety, and performance when making your charger decision. Next, we’ll explore professional maintenance techniques to maximize your charger’s lifespan.
Optimizing Charger Performance and Battery Longevity
Proper charger maintenance directly impacts both your golf cart’s performance and battery lifespan. These professional-grade practices can extend your system’s service life by 30-50% while maintaining peak efficiency.
Advanced Maintenance Schedule
Follow this comprehensive maintenance timeline for optimal results:
| Frequency | Task | Impact |
|---|---|---|
| Weekly | Terminal cleaning with dielectric grease | Prevents 85% of connection-related failures |
| Monthly | Full discharge/recharge cycle | Maintains battery memory calibration |
| Quarterly | Thermal imaging inspection | Identifies components before failure |
Environmental Optimization
Charger performance varies significantly based on operating conditions:
- Temperature control – Maintain between 50-80°F (10-27°C) for ideal charging
- Ventilation space – Allow minimum 6 inches clearance on all sides
- Moisture protection – Use silica gel packs in storage areas
Case study: A golf course extended charger lifespan from 3 to 7 years simply by installing $25 cooling fans in their charging station.
Future-Proofing Your Charging System
Emerging technologies are changing charger maintenance:
- Smart chargers with self-diagnostics (automatically alert for capacitor wear)
- Cloud monitoring tracks performance trends over time
- Modular designs allow component-by-component upgrades
Pro tip: When upgrading, look for chargers with CAN bus communication – they provide real-time battery health data that prevents 90% of preventable failures.
These advanced practices represent the difference between basic operation and optimized performance. In our final section, we’ll summarize key takeaways and provide a definitive decision-making flowchart.
Advanced Charger-Battery System Integration and Optimization
Maximizing your golf cart’s electrical system performance requires understanding the complex interplay between charger capabilities and battery chemistry. This deep dive reveals professional techniques for achieving perfect system harmony.
Chemistry-Specific Charging Profiles
Different battery types demand precise charging parameters:
| Battery Type | Optimal Voltage | Charge Algorithm | Special Considerations |
|---|---|---|---|
| Flooded Lead-Acid | 2.45V/cell | 3-stage (bulk/absorption/float) | Equalization charging monthly |
| AGM | 2.40V/cell | Modified constant current | Strict voltage limits |
| Lithium-Ion | 3.65V/cell | CC/CV (constant current/voltage) | Requires BMS integration |
Real-world example: A golf course switched to lithium but kept lead-acid chargers, causing 40% capacity loss in 6 months. A $200 charger reprogramming fixed this.
System-Wide Voltage Optimization
Professional technicians adjust these parameters for peak performance:
- Equalization voltage – Typically 2.5V/cell for desulfation cycles
- Temperature compensation – -5mV/°C/cell for lead-acid batteries
- Transition thresholds – Bulk-to-absorption switch at 80% SOC
Pro tip: Use a data logger for 48 hours to map your system’s actual voltage curves – most carts operate outside ideal parameters without owners realizing it.
Advanced Load Management
Modern smart chargers enable these professional features:
- Priority charging – Allocates power based on battery bank state
- Load shedding – Temporarily reduces charger output for accessory use
- Peak shaving – Integrates with solar for optimal grid usage
Case study: A resort fleet implemented intelligent charging that reduced energy costs by 35% while extending battery life 20%, paying for the system upgrade in 14 months.
This level of system optimization separates casual users from professional-grade maintenance. In our conclusion, we’ll provide a master troubleshooting flowchart incorporating all these advanced concepts.
Mastering Charger Performance Validation and Risk Management
Professional-grade charger maintenance requires systematic validation processes and comprehensive risk assessment. These advanced protocols ensure optimal performance while mitigating potential hazards throughout your charging system’s lifecycle.
Comprehensive Performance Validation Protocol
Implement this 5-stage testing sequence for complete charger verification:
| Test Phase | Parameters Measured | Acceptance Criteria | Tools Required |
|---|---|---|---|
| No-Load Verification | Open-circuit voltage, standby current | ±1% of rated voltage | Precision multimeter |
| Full-Load Test | Voltage drop, ripple current, temperature rise | <3% voltage sag at max load | DC load bank, thermal camera |
| Cycle Endurance | Charge termination accuracy, time consistency | ±0.5V cutoff precision | Data logger, SOC meter |
Advanced Risk Mitigation Strategies
Professional facilities implement these layered protection measures:
- Three-tier thermal protection:
- Component-level fusing (protects individual parts)
- Board-level thermal cutoffs (safeguards circuits)
- System-wide temperature monitoring (prevents cascade failures)
- Arc-fault detection using high-frequency monitoring (catches 95% of developing shorts)
- Dielectric strength testing (5kV AC for 1 minute on all input/output isolation barriers)
Case study: A municipal course reduced charger-related fires by 100% after implementing infrared scanning during routine maintenance checks.
Long-Term Performance Tracking
Establish these key performance indicators (KPIs) for continuous improvement:
- Charge efficiency ratio (Watts-in vs. Watts-stored, should exceed 85%)
- Mean time between failures (Track component lifespan trends)
- Energy cost per charge cycle (Identifies deteriorating efficiency)
Pro tip: Create a charger “health scorecard” tracking 12 parameters monthly – this predictive approach catches 80% of failures before they occur.
This comprehensive approach transforms reactive maintenance into predictive performance optimization, delivering superior reliability and cost-efficiency throughout your charging system’s operational life.
Final Thoughts: Mastering Golf Cart Charger Diagnostics
Throughout this guide, we’ve explored the comprehensive process of diagnosing golf cart battery charger issues – from recognizing early warning signs like incomplete charging cycles and physical damage, to performing advanced voltage and current tests, and finally determining whether repair or replacement makes the most sense.
You’ve learned professional techniques like waveform analysis and thermal imaging, plus critical maintenance practices that can extend your charger’s lifespan by years.
Take action today: Start by performing the basic voltage tests we outlined, then progressively implement more advanced diagnostics as needed.
Remember that catching charger issues early prevents costly battery damage and unexpected downtime. With this knowledge, you’re now equipped to make informed decisions that will keep your golf cart running smoothly for seasons to come.
Frequently Asked Questions About Golf Cart Battery Chargers
What are the most common signs of a failing golf cart battery charger?
The most reliable indicators include the charger shutting off prematurely (before completing 8-12 hour cycles), failing to maintain proper voltage (below 50V for 48V systems), or showing physical damage like bulging capacitors.
You might also notice unusual sounds like buzzing or clicking, or the charger remaining cold during operation when it should warm slightly. These symptoms often appear gradually before complete failure.
How can I test my golf cart charger without professional equipment?
You can perform basic diagnostics with just a multimeter: First check output voltage (should be 2-5V above battery rating).
Then monitor voltage drop when connecting to batteries – a good charger maintains stable voltage under load. Finally, time a full charge cycle – if it consistently finishes too fast (under 6 hours), your charger likely has faulty current regulation.
Why does my charger get extremely hot during operation?
Excessive heat typically indicates failing components like diodes, voltage regulators, or transformers working harder to compensate for internal resistance.
While some warmth is normal, casing temperatures above 150°F signal problems. Check for dust buildup in vents first, then inspect for swollen capacitors. Prolonged overheating can damage both charger and batteries.
Can I use any 48V charger for my golf cart?
Not all 48V chargers are compatible. Key factors include: charge algorithm (3-stage vs. CC/CV), maximum amperage (should match battery bank capacity), and connector type.
Using mismatched chargers can undercharge or overcharge batteries. For example, lithium batteries require chargers with battery management system (BMS) communication that lead-acid chargers lack.
How often should I replace my golf cart battery charger?
Quality chargers typically last 5-8 years with proper maintenance. However, consider replacement if repair costs exceed 40% of new unit price, or if your charger lacks modern safety features like automatic shutoff. Upgrading becomes economical when new technologies (like smart charging) can extend battery life by 30% or more.
What’s the difference between ferroresonant and microprocessor chargers?
Ferroresonant chargers (older technology) use heavy transformers for simple voltage regulation, while microprocessor models actively monitor and adjust charging parameters.
Modern chargers provide: precise voltage control (±0.5% vs ±5%), temperature compensation, and battery desulfation cycles. For example, a Lester Summit II can extend battery life 2-3 years compared to basic models.
Can a bad charger damage my golf cart batteries?
Absolutely. Faulty chargers cause two major battery issues: chronic undercharging leads to sulfation (crystal buildup), while overcharging causes plate corrosion and electrolyte loss.
A single overcharge event at 60V (vs recommended 54V) can reduce lead-acid battery lifespan by 30%. Always verify your charger’s output matches battery specifications.
Is it worth repairing an old golf cart charger?
Repair makes sense when: the unit is high-quality (OEM brands like Lester or Delta-Q), repair costs are under $100, and the charger is less than 7 years old.
However, replacing makes more sense when facing multiple component failures or when upgrading battery technology (like switching to lithium). Always compare repair costs against energy savings from newer, more efficient models.