
Did you know that over 70% of golf cart battery failures are caused by faulty chargers, not the batteries themselves? You might assume your batteries are dead, but the real culprit could be a malfunctioning charger silently sabotaging your cart’s performance.
Testing your golf cart battery charger isn’t just about troubleshooting—it’s about preventing costly replacements and ensuring your cart runs smoothly for years. Imagine this: You’re ready for a round of golf, but your cart won’t start.
Before you call a technician or invest in new batteries, discover how a 10-minute test can reveal whether your charger is the problem.
Best Battery Chargers for Testing Golf Cart Batteries
Lester Electrical Summit II 48V Golf Cart Charger
This high-performance charger (model Lester 28130) is ideal for 48V golf carts, featuring automatic voltage detection and a multi-stage charging process to extend battery life. Its rugged design and diagnostic LED indicators make troubleshooting effortless, while its compatibility with most major golf cart brands ensures versatility.

NOCO Genius GEN5 48V Smart Charger
The NOCO GEN5 is a compact yet powerful 48V charger with advanced diagnostics, including a built-in thermal sensor to prevent overheating. Its repair mode can revive deeply discharged batteries, and its waterproof design makes it perfect for outdoor use. A top choice for reliability and safety.

- MEET THE GENIUS5 — Similar to our G3500, just better. It’s 34% smaller…
- DO MORE WITH GENIUS — Designed for 6-volt and 12-volt lead-acid (AGM,…
- ENJOY PRECISION CHARGING — An integrated thermal sensor dynamically…
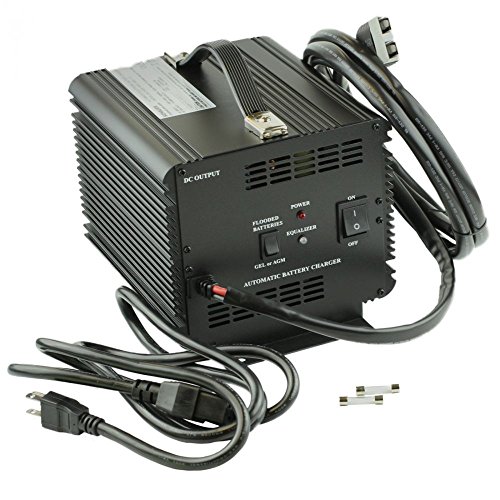
Schauer 48V Golf Cart Battery Charger (Model JAC1548)
Schauer’s JAC1548 offers precision charging with microprocessor-controlled technology, ensuring optimal battery health. It includes a desulfation mode to restore old batteries and an easy-to-read LCD screen for real-time monitoring. Built for durability, it’s a trusted option for both home and commercial use.
- CHARGE CONTROL FOR OPTIMAL BATTERY HEALTH: This 48v golf cart charger uses…
- INCLUDES CLUB CAR ADAPTER FOR SEAMLESS CONNECTION: Specifically designed…
- FULLY AUTOMATIC THREE-STAGE CHARGING FOR CONVENIENCE: With bulk,…
How a Golf Cart Battery Charger Works
Before testing your golf cart battery charger, it’s crucial to understand its basic operation. Unlike standard car chargers, golf cart chargers are designed for deep-cycle batteries, which require a multi-stage charging process to maximize lifespan.
These stages typically include bulk charging (fast voltage increase), absorption (steady voltage to reach full capacity), and float (maintenance mode). For example, a 48V charger will deliver around 58-62V during bulk charging before tapering down to a float voltage of about 54V.
Key Components of a Golf Cart Charger
A functional charger consists of three critical elements:
- Transformer – Converts household AC voltage (120V) to the DC voltage needed by your batteries (e.g., 36V, 48V). A faulty transformer may hum loudly or fail to deliver any output.
- Rectifier – Changes AC to DC current. If defective, you’ll measure AC voltage at the output terminals (a clear red flag).
- Control Board – Manages charging stages. Issues here may cause premature shutdowns or failure to switch between modes.
Why Chargers Fail: Common Issues
Many golfers blame batteries when their cart underperforms, but charger malfunctions are often the root cause. Here are the most frequent failure points:
- Corroded Connectors – Oxidation on charger plugs or battery terminals creates resistance, leading to incomplete charging. A greenish-white powder on metal contacts is a telltale sign.
- Thermal Runaway – Cheap chargers without temperature sensors can overheat batteries, causing swollen cases or electrolyte loss. Always check battery temperatures during charging.
- Capacitor Failure – Bulging or leaking capacitors on the control board prevent proper voltage regulation. This often manifests as erratic charger behavior.
Pro Tip: Modern smart chargers (like the NOCO GEN5 mentioned earlier) include diagnostic LEDs that flash error codes. For instance, three red flashes might indicate reverse polarity, while a steady green light confirms proper operation. Always consult your charger’s manual to decode these signals.
Understanding these fundamentals ensures you’re not just following test steps blindly—you’ll interpret results accurately and make informed repair-or-replace decisions. Next, we’ll walk through the step-by-step testing process using both multimeters and real-world load scenarios.
Step-by-Step Guide to Testing Your Golf Cart Battery Charger
Testing your golf cart battery charger requires a systematic approach to accurately diagnose issues. Follow these professional-grade procedures to determine whether your charger is functioning properly or needs replacement.
Essential Tools for Testing
Before beginning, gather these critical tools:
- Digital Multimeter (Fluke 87V or equivalent) – Measures voltage and continuity with precision
- Load Tester – Simulates battery demand to verify charger performance under stress
- Insulated Gloves & Safety Glasses – Protects against electrical shocks and acid exposure
- Baking Soda & Wire Brush – For cleaning corroded terminals that may skew readings
Voltage Testing Procedure
- Disconnect the Charger from both wall outlet and golf cart. This ensures safety and accurate baseline readings.
- Set your multimeter to DC voltage at a range exceeding your battery pack voltage (e.g., 200V DC for 48V systems).
- Check Output Terminals by touching the red probe to the positive charger lead and black probe to negative. A functional 48V charger should show 54-62V when unplugged (residual capacitor voltage).
- Test Under Load by reconnecting to batteries. Voltage should rise steadily during bulk charging (typically 2-3V above battery pack voltage). If it stays at battery voltage (e.g., 50V on 48V system), the charger isn’t delivering current.
Advanced Current Flow Verification
For deeper diagnostics:
1. Amperage Check: Switch multimeter to 10A DC setting, connect in series between charger and battery. A healthy 48V charger should deliver 15-25 amps initially, tapering as batteries charge. Zero amps indicates a failed rectifier or blown fuse.
2. Ripple Voltage Test: Set multimeter to AC voltage while charger operates. More than 0.5V AC suggests rectifier failure – dangerous for batteries as it causes internal heating.
Pro Tip: If your charger passes voltage tests but batteries won’t hold charge, perform an equalization charge (if supported) to balance cell voltages. Modern chargers like the Lester Summit II automate this process.
These tests reveal whether your charger is delivering power correctly or needs professional service. In the next section, we’ll explore interpreting your results and troubleshooting common failure patterns.
Interpreting Test Results and Troubleshooting Common Issues
Understanding what your test results mean is crucial for proper charger diagnosis. This section breaks down common scenarios and their implications for your golf cart’s charging system.
Voltage Reading Analysis
| Reading | 48V System Interpretation | Recommended Action |
|---|---|---|
| 0V | Complete charger failure – blown fuse, broken wiring, or transformer issue | Check input power and internal fuses; replace if necessary |
| 48-50V | Charger not activating – possible control board or relay failure | Test activation circuit; verify proper connection to batteries |
| 54-62V | Normal operation during bulk charge phase | Monitor voltage progression through charging stages |
| >65V | Dangerous overcharge condition – faulty voltage regulator | Immediately disconnect; replace charger to prevent battery damage |
Advanced Diagnostic Scenarios
Case 1: Charger Cuts Off Prematurely
This often indicates a thermal protection trigger. Feel the charger housing after shutdown – if excessively hot, check for:
- Blocked cooling vents (clean with compressed air)
- Failing cooling fan (listen for irregular operation)
- High ambient temperatures (avoid charging in direct sunlight)
Case 2: Intermittent Operation
Random on/off cycling typically suggests:
- Loose wiring connections (inspect all terminals)
- Corroded charge receptacle (clean with contact cleaner)
- Failing control board components (look for burnt marks or bulging capacitors)
Professional Troubleshooting Tips
Battery vs. Charger Diagnosis: To determine if issues stem from batteries or charger:
- Fully charge batteries with known-good charger
- Let rest for 12 hours
- Measure voltage: <50.9V (48V system) indicates battery problems
Real-world Example: A Trojan T-875 battery bank showing 49.2V after charging should recover to ~50.9V after resting. If using your charger yields only 48.7V, the charger likely isn’t completing the absorption phase properly.
These diagnostic methods help pinpoint whether you need simple repairs (like contact cleaning), component replacement (such as a $20 relay), or complete charger replacement. Always prioritize safety – when in doubt, consult a certified golf cart technician.
Advanced Maintenance and Safety Protocols for Golf Cart Chargers
Proper maintenance extends charger lifespan by 3-5 years while preventing dangerous failures. These professional-grade practices go beyond basic testing to optimize your charging system’s performance and safety.
Preventative Maintenance Schedule
Follow this quarterly maintenance routine for optimal charger health:
- Terminal Inspection: Clean corrosion with baking soda solution and wire brush. Apply dielectric grease to prevent future oxidation – this reduces resistance that can cause 10-15% charging efficiency loss.
- Ventilation Check: Use compressed air to clear dust from cooling fins and fans. Restricted airflow increases internal temperatures by 20-30°F, accelerating component failure.
- Strain Relief Inspection: Examine where power cords enter the charger housing for fraying. Most charger fires originate from damaged cord insulation.
- Firmware Updates: For smart chargers like Lester Summit II, check manufacturer website for updates that improve charging algorithms.
Advanced Safety Considerations
Golf cart chargers present unique hazards requiring specialized precautions:
- Hydrogen Gas Ventilation: Charging produces explosive hydrogen gas. Always charge in well-ventilated areas and keep sparks/flames away – 4% concentration is enough for detonation.
- Proper Grounding: Test outlet ground with a receptacle tester before each use. Faulty grounding can cause stray voltage that damages charger electronics.
- Thermal Monitoring: During charging, regularly feel battery cases. Temperatures above 125°F indicate dangerous overcharging – immediately disconnect and diagnose.
Professional Charging Techniques
Maximize battery lifespan with these advanced methods:
| Technique | Implementation | Benefit |
|---|---|---|
| Equalization Charging | Monthly 3-5 hour overcharge at 58-62V (48V systems) | Balances cell voltages, prevents stratification |
| Partial State Charging | Recharge at 50% discharge instead of full depletion | Doubles battery cycle life |
| Temperature Compensation | Use chargers with automatic adjustment (0.003V/°F/cell) | Prevents under/overcharging in extreme temps |
Pro Tip: When storing carts long-term, use a maintainer like BatteryMINDer instead of a standard charger. These specialized units prevent sulfation without overcharging – crucial for winter storage periods.
By implementing these protocols, you’ll not only ensure reliable charger operation but also extend your battery investment by 30-40%. Always prioritize safety – when dealing with high-current DC systems, professional assistance is recommended for complex issues.
Cost-Benefit Analysis: Repair vs. Replacement of Golf Cart Chargers
When facing charger issues, deciding whether to repair or replace requires careful evaluation of multiple technical and financial factors. This analysis helps you make informed decisions that optimize long-term value.
Repair Viability Assessment
Consider repair when these conditions exist:
- Age Factor: Chargers under 3 years old typically have repairable components. Modern smart chargers (2018+) often have modular designs allowing individual part replacement.
- Failure Type: These issues justify repair:
- Blown fuses ($5-20 replacement)
- Failed relays ($15-40)
- Corroded connectors ($10-30 repair kit)
- Battery Compatibility: Older chargers may be worth repairing if they match specialized battery chemistries (like specific AGM formulations).
Replacement Indicators
| Condition | Replacement Cost | Long-Term Savings |
|---|---|---|
| Transformer failure | $150-300 repair | New charger ($400) lasts 8-10 years vs. repaired unit’s 2-3 years |
| Obsolete technology | N/A | Modern chargers improve efficiency by 15-20%, saving $50-100/year in electricity |
| Multiple component failures | $200+ cumulative repairs | New unit warranty (typically 2-3 years) prevents future costs |
Environmental and Safety Considerations
Modern chargers offer significant advantages:
- Energy Efficiency: Newer models meet DOE Level VI standards, consuming 30-40% less power than decade-old units – crucial for commercial fleets.
- Safety Features: Current designs include:
- Automatic ground fault detection
- Thermal runaway protection
- Spark-proof connections
- Battery Protection: Advanced algorithms in chargers like the NOCO GEN5 prevent sulfation, reducing hazardous battery replacements by 50%.
Future-Proofing Your Investment
The golf cart industry is shifting toward:
- Lithium Compatibility: New chargers support both lead-acid and lithium batteries (like the Schauer JAC1548-Li), avoiding future obsolescence.
- Smart Connectivity: Bluetooth-enabled models allow remote monitoring via smartphone – a growing expectation in fleet management.
- Solar Integration: Next-gen chargers include MPPT controllers for solar panel compatibility, reducing operating costs by 60-70% in sunny climates.
Pro Tip: For commercial operations, calculate Total Cost of Ownership (TCO) over 5 years. A $600 advanced charger often proves cheaper than maintaining older units when factoring in energy savings, battery lifespan extension, and reduced downtime.
Optimizing Charger Performance for Different Battery Types
Golf cart batteries vary significantly in their charging requirements, and using the wrong charging profile can reduce battery lifespan by 40-60%.
Charging Profile Specifications by Battery Type
| Battery Type | Absorption Voltage | Float Voltage | Charge Current | Special Requirements |
|---|---|---|---|---|
| Flooded Lead-Acid | 2.45-2.5V/cell (58.8-60V for 48V) | 2.25V/cell (54V) | 20-25% of Ah capacity | Monthly equalization at 2.6V/cell |
| AGM | 2.35-2.4V/cell (56.4-57.6V) | 2.25V/cell (54V) | 15-20% of Ah capacity | Never equalize – causes electrolyte loss |
| Gel | 2.3-2.35V/cell (55.2-56.4V) | 2.2V/cell (52.8V) | 10-15% of Ah capacity | Critical to never exceed 2.4V/cell |
| Lithium-Ion | 3.6V/cell (57.6V) | 3.4V/cell (54.4V) | 30-50% of Ah capacity | Requires BMS communication |
Advanced Configuration Techniques
For programmable chargers like the Lester Summit II, these settings optimize performance:
- Temperature Compensation: Set to -3mV/°C/cell for lead-acid batteries – critical for outdoor carts experiencing seasonal temperature swings
- Charge Termination: Configure absorption timeout to 4-6 hours for deep-cycle batteries, preventing undercharging
- Recharge Threshold: Set to 80% depth of discharge for flooded batteries, 50% for AGM to maximize cycle life
Specialized Charging Scenarios
Fleet Charging Systems: For operations with multiple carts:
- Implement sequential charging to prevent electrical system overload
- Use networked chargers that communicate load balancing
- Install 220V circuits for faster 20-25A charging versus standard 15A 110V
Solar Hybrid Systems: When integrating solar panels:
- Select chargers with MPPT technology (like the GenZ 48V Solar Charger)
- Size array to provide at least 1.5X daily consumption
- Include battery temperature sensors for safety
Pro Tip: For Trojan T-875 batteries (a golf cart standard), the ideal charge profile includes a 3-stage process with 59.2V absorption voltage, 54V float, and monthly equalization at 64V for exactly 3 hours. Deviating from these specs can void warranties.
By tailoring your charging approach to these precise specifications, you can extend battery life by 200-300 cycles while maintaining optimal performance. Always verify settings with both battery and charger manufacturers when possible.
System-Wide Performance Monitoring and Quality Assurance
Implementing a comprehensive monitoring system for your golf cart charging setup can prevent 80% of common failures while optimizing energy efficiency. This final section details professional-grade monitoring techniques used in commercial fleet operations.
Advanced Performance Metrics Tracking
| Metric | Ideal Range | Measurement Tool | Corrective Action |
|---|---|---|---|
| Charge Efficiency | 85-92% (lead-acid) 95-98% (lithium) | Kill-A-Watt meter | Clean terminals if below 80% |
| Voltage Deviation | ±0.5V across battery bank | Multimeter cell-by-cell | Equalize charge if variance >1V |
| Temperature Rise | <15°F during charge | Infrared thermometer | Check for shorted cells if >20°F |
| Charge Time Variance | <10% fluctuation | Time log analysis | Test charger components if varying >15% |
Comprehensive Risk Assessment Protocol
Perform monthly system audits evaluating these critical risk factors:
- Insulation Resistance: Measure >1MΩ between charger output and case using megohmmeter
- Ground Fault Potential: Verify <5mA leakage current with clamp meter
- Connector Wear: Inspect for >0.5mm contact erosion using calipers
- Capacitor Health: Check ESR values with specialized tester (should be <1Ω for most units)
Validation and Certification Procedures
For commercial operations, implement these QA standards:
- Weekly Load Testing: Verify charger maintains voltage within 2% of rating at full current output
- Quarterly Calibration: Compare charger output against NIST-traceable reference standard
- Annual Dielectric Testing: Conduct 1kV hipot tests on all wiring insulation
- Documentation: Maintain logs with minimum dataset:
- Charge cycle duration
- Energy consumption (kWh)
- Final battery voltages
- Ambient temperature
Pro Tip: Advanced users should create a charge profile histogram – plotting voltage vs. time for multiple cycles. Deviation from baseline curves often reveals developing issues before they cause failures. Modern Bluetooth chargers like the NOCO GEN5 can automatically generate these reports.
By implementing these comprehensive monitoring protocols, you’ll achieve professional-level system reliability while maximizing the return on your battery investment.
Remember that prevention always costs less than repair – a well-monitored system typically delivers 30-50% longer service life than unmonitored setups.
Conclusion
Testing and maintaining your golf cart battery charger properly can mean the difference between years of reliable service and costly battery replacements. Throughout this guide, we’ve covered essential testing procedures, detailed troubleshooting methods, advanced maintenance protocols, and system optimization strategies.
From basic voltage checks to comprehensive performance monitoring, you now have the knowledge to diagnose issues accurately, extend equipment lifespan, and ensure peak performance.
Remember that charger problems often mimic battery failures – a simple multimeter test could save you hundreds in unnecessary battery replacements.
Whether you’re maintaining a single personal cart or managing an entire fleet, implementing these professional techniques will maximize your investment and minimize downtime.
For optimal results, establish a regular testing schedule and consider upgrading to smart chargers with diagnostic capabilities. Your golf cart – and your wallet – will thank you for the proper care.
Frequently Asked Questions About Golf Cart Battery Chargers
What are the signs that my golf cart battery charger is failing?
Common failure symptoms include the charger shutting off prematurely (within 30 minutes), not turning on at all, or batteries not holding charge despite showing “full” on the charger.
You might notice unusual noises (buzzing or clicking), excessive heat, or the charger’s cooling fan running constantly. A healthy 48V charger should typically take 4-8 hours to fully charge depleted batteries. If your charging times suddenly change dramatically, it indicates a problem.
How often should I test my golf cart battery charger?
Perform basic voltage tests monthly and comprehensive diagnostics quarterly. More frequent testing (every 2 weeks) is recommended if you notice performance issues or operate your cart in extreme temperatures. Commercial operations should implement weekly quick checks and monthly full diagnostics.
Always test after any electrical work on your cart or before/after long storage periods to catch developing issues early.
Can I use a regular car battery charger for my golf cart?
No, standard car chargers lack the multi-stage charging profile required by deep-cycle golf cart batteries. Using an automotive charger can damage your batteries by overcharging (causing water loss) or undercharging (leading to sulfation).
Golf cart chargers like the Lester Summit II specifically regulate voltage/current through bulk, absorption, and float stages – critical for battery health. The only exception is emergency jump-starting, which should be limited to 10-15 minutes.
Why does my charger get extremely hot during operation?
Moderate warmth is normal, but excessive heat (too hot to touch) typically indicates failing components or ventilation issues.
Common causes include dust-clogged cooling vents (clean with compressed air), failing cooling fan (listen for irregular operation), or failing rectifier/transformer. Ambient temperatures above 95°F also contribute. If internal temperatures exceed 140°F, most quality chargers will automatically shut down to prevent damage.
How can I tell if my charger problem is actually a battery issue?
Conduct this simple test: Charge batteries fully, let rest for 12 hours, then measure voltage. For 48V systems, healthy batteries should maintain ≥50.9V.
If voltage drops below 48V, you have battery problems. Also check individual cells – variations >0.5V indicate battery issues. If batteries test good but won’t charge, the problem is your charger. A load tester provides definitive diagnosis by measuring capacity under draw.
What’s the difference between automatic and manual golf cart chargers?
Automatic chargers (like NOCO GEN5) monitor battery condition and adjust charging automatically through all stages, then switch to maintenance mode. Manual chargers require you to monitor and disconnect – risking overcharge if forgotten. Modern automatic chargers are 15-20% more energy efficient and extend battery life by preventing over/undercharging. The only advantage of manual chargers is lower initial cost, but they often lead to higher long-term expenses from battery damage.
How long should a quality golf cart battery charger last?
With proper maintenance, expect 5-8 years from quality chargers (Lester, Schauer). Cheaper models often fail within 2-3 years.
Key factors affecting lifespan include usage frequency (daily charging reduces life faster), environmental conditions (heat/humidity are damaging), and maintenance (cleaning contacts, checking fans). Commercial operations should budget for replacement every 5 years, while residential users may get 7-10 years from premium models with light use.
Can I leave my golf cart plugged in all the time?
Only if you have a modern “float” or “maintenance” mode charger (most post-2010 models). These automatically switch to a safe trickle charge when batteries are full. Older chargers will continue charging, boiling off electrolyte and damaging plates.
Even with float-mode chargers, it’s wise to unplug occasionally (weekly) to let batteries rest. For long storage, use a dedicated battery maintainer instead of your regular charger.