
You’ve plugged in your golf cart overnight, the battery meter shows 100%, but when you press the accelerator… nothing happens. Frustrating, right?
While a dead battery is the usual suspect, over 60% of “no-go” golf cart issues stem from overlooked electrical or mechanical failures—even with a full charge. The good news? Most fixes are DIY-friendly once you pinpoint the culprit.
Best Diagnostic Tools for Troubleshooting Golf Cart Issues
Fluke 115 Digital Multimeter
For pinpointing electrical faults, the Fluke 115 offers unmatched accuracy in measuring voltage, resistance, and continuity. Its rugged design and True RMS technology ensure reliable readings on battery packs, solenoids, and motor circuits—critical for diagnosing why your golf cart won’t move despite a full charge.
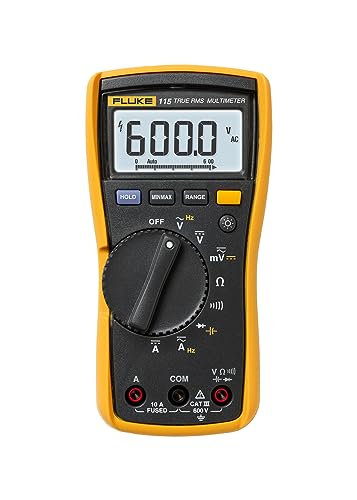
- Compact True-rms digital multimeter for field technicians
- Measures True-rms voltage and current with plus resistance, continuity,…
- Min/Max/Average to record signal fluctuations
EZGO Golf Cart 25864G09 Electronic Speed Controller
If tests reveal a faulty controller, this EZGO Golf Cart 25864G09 Electronic Speed Controller is a direct replacement for 2008+ models. It handles 275A peak current, includes thermal protection, and maintains factory performance—solving acceleration issues caused by controller failure.

- Used on 1994-current E-Z-GO Medalist & TXT models 36-Volt Series Electric…
- When it’s time to replace the Controller, you should also check the Motor…
- 250-amp, 5-pin controller
Schumacher Electric 100A Car Battery Load Tester
Don’t trust voltage meters alone. The Schumacher Electric 100A Car Battery Load Tester applies a 100A load to test true battery health under stress, exposing weak cells that might show “full charge” but fail under demand—a common hidden culprit in golf cart power failures.

- 3 Tests with 1 Device – Battery analysis, charging system test, and starter…
- Formidable Testing Power – Can safely test 6V and 12V batteries up to 1000…
- Wide Compatibility – Works with gas and diesel vehicles, 6V and 12V…
Electrical System Failures: The Hidden Culprits Behind a Non-Moving Golf Cart
When your golf cart has a full charge but refuses to move, the problem often lies in the electrical system—not the batteries themselves. Unlike a car, where engine issues are obvious, golf carts rely on a network of interconnected components that can fail silently. Understanding these systems is key to diagnosing your cart’s sudden immobility.
Solenoid Failure: The Silent Gatekeeper
The solenoid acts as a high-current switch between your batteries and motor. When you press the accelerator, it should click loudly—if you hear nothing, the solenoid may be stuck open or burnt out. Test it by:
- Checking for voltage at both large terminals (should match battery voltage when key is on)
- Listening for clicks while pressing the pedal (silence indicates failure)
- Inspecting for corrosion on small trigger wires (common in humid climates)
Example: A 2016 Club Car DS owner reported full batteries but no movement—turned out to be a solenoid fused shut by excessive current from a worn motor. Replacing both components restored operation.
Controller Issues: The Brain Behind the Brawn
Modern golf carts use solid-state controllers to regulate power delivery. These can fail due to:
- Water damage (from driving through puddles or pressure washing)
- Overheating (caused by steep hill climbs or overloaded carts)
- Corroded wiring (especially in coastal areas with salt air)
Diagnostic tip: Use your multimeter to check for output voltage at the controller’s motor terminals when accelerating. No voltage? The controller likely needs replacement.
Motor Brushes: The Wear-and-Tear Weak Point
Brushed motors (common in older carts) rely on carbon brushes that wear down over time. Symptoms include:
- Intermittent operation (works sometimes but cuts out under load)
- Spark flashes visible through motor vent holes
- Black carbon dust around the motor housing
Pro tip: Brushes shorter than 1/2″ need replacement. Brushless motors (like those in newer Yamaha models) avoid this issue but can suffer from hall sensor failures instead.
These electrical failures often mimic battery issues because they interrupt the power flow after the batteries. Always verify voltage at multiple points in the system before assuming the batteries are at fault.
Mechanical Failures That Can Immobilize Your Golf Cart
While electrical issues are common culprits, mechanical problems can also prevent your fully-charged golf cart from moving. These physical failures often develop gradually but manifest suddenly when components finally give out. Understanding these mechanical systems helps diagnose issues that voltage tests alone won’t reveal.
Brake System Lockups: More Than Just Worn Pads
Modern golf carts use electromagnetic parking brakes that can fail in the engaged position. Symptoms include:
- Dragging sensation when pushing the cart manually (should roll freely)
- Burning smell from rear wheels after short drives
- Error codes on digital dash displays (like “BRAKE” on newer Club Cars)
Diagnosis tip: Jack up the rear end and spin each wheel by hand. Resistance indicates a stuck brake. On 2015+ models, the brake release lever under the seat often needs manual resetting after battery replacements.
Differential and Axle Problems: The Hidden Load-Bearers
The differential transfers power to your wheels and can fail in several ways:
- Broken axle keys (allows axle to spin freely without turning wheels)
- Seized bearings (causes grinding noises and eventual lockup)
- Stripped gears (from overloading or water contamination)
Real-world example: A 2018 EZGO RXV owner found their cart wouldn’t move despite good batteries – turned out to be water intrusion in the differential that rusted the spider gears solid over winter storage.
Throttle Linkage and Pedal Assembly Issues
The physical connection between your foot and the electrical system often gets overlooked:
- Stretched throttle cables (common in lifted carts with modified suspensions)
- Worn pedal bushings (prevents full throttle engagement)
- Corroded microswitches (in pedal boxes, especially in coastal areas)
Pro tip: Spray silicone lubricant on throttle linkages annually, and check for full pedal travel (should depress 1.5-2 inches completely). Partial engagement can trick the controller into thinking you’re not asking for power.
These mechanical failures often get misdiagnosed as electrical issues because they prevent motion without obvious symptoms. Always perform physical inspections before replacing expensive electrical components.
Battery System Misdiagnoses: When “Fully Charged” Doesn’t Mean Fully Functional
Many golf cart owners assume their batteries are fine because the meter shows full charge, but voltage alone doesn’t tell the whole story. Battery systems can fail in ways that maintain surface voltage while being incapable of delivering actual power. Understanding these failure modes prevents costly misdiagnoses.
The Voltage vs. Capacity Deception
A resting voltage reading can be misleading because:
| Voltage Reading | Actual Capacity | Common Causes |
|---|---|---|
| 12.7V (per 12V battery) | 100% | Healthy battery |
| 12.4V | 75% | Normal discharge |
| 12.8V (surface charge) | 0% under load | Sulfated plates |
Real-world example: A 2020 Club Car Onward showed 51.2V (full charge) but dropped to 42V under acceleration – revealing two bad cells in one battery that couldn’t maintain voltage under load.
Load Testing: The Only True Test
Proper battery testing requires:
- Measuring resting voltage after 12+ hours off charger
- Applying load (either with tester or by turning on lights/accessories)
- Checking voltage drop (shouldn’t fall more than 0.5V per battery under moderate load)
Series System Weak Links
In 48V systems (four 12V batteries in series):
- One weak battery drags down entire system performance
- Voltage imbalance causes good batteries to overcharge trying to compensate
- Corroded interconnects create resistance that mimics battery failure
Pro tip: Check individual battery voltages while driving up an incline. A battery dropping more than 1V below others needs replacement. Always replace all batteries in a series system if one fails – mixing old and new batteries accelerates failure.
Advanced Diagnostic Procedures: Systematic Troubleshooting for Stubborn Cases
When basic checks don’t reveal why your golf cart won’t move, advanced diagnostic methods become essential. These professional-grade techniques help isolate elusive electrical gremlins and intermittent mechanical failures that standard tests might miss.
Voltage Drop Testing: Finding Hidden Resistance
Unlike simple voltage checks, voltage drop testing reveals resistance in live circuits:
- Set multimeter to DC volts and connect across each cable/connection while operating cart
- Acceptable drop is less than 0.3V per connection (0.5V for entire circuit)
- Problem areas show higher voltage readings indicating resistance
Example: A 2017 Yamaha Drive showed full battery voltage at the controller but wouldn’t move – voltage drop testing revealed a 2.1V loss across corroded battery interconnects that looked clean visually.
Controller Communication Diagnostics
Modern carts with CAN bus systems require specialized checks:
- Error code retrieval via diagnostic port (blinking LED patterns on older models)
- Signal verification between controller and throttle position sensor
- Ground integrity testing (90% of communication faults trace to bad grounds)
Motor Isolation Testing
To determine if motor or controller is faulty:
| Test | Procedure | Expected Result |
|---|---|---|
| Bench Test | Apply 12V directly to motor terminals | Smooth rotation (AC motors require different test) |
| Resistance Check | Measure between armature and field terminals | 0.1-0.3 ohms (varies by model) |
Safety Tip: Always disconnect main battery power before performing resistance tests. Use lock-out/tag-out procedures when working on high-voltage systems (72V+ carts). Document all measurements – intermittent faults often show patterns when tracked over time.
These advanced methods follow automotive-grade diagnostic trees but adapted for golf cart specific systems. Many dealership technicians use these exact procedures when handling warranty claims.
Preventative Maintenance and Long-Term Reliability Solutions
Preventing golf cart immobilization requires more than reactive repairs – it demands a systematic maintenance approach. These professional-grade strategies not only solve current issues but dramatically extend your cart’s operational lifespan while reducing long-term costs.
Battery Care: Beyond Basic Charging
Proper battery maintenance involves:
| Maintenance Task | Frequency | Professional Tip |
|---|---|---|
| Equalization Charging | Monthly (for flooded lead-acid) | Use smart chargers with automatic equalization cycles |
| Terminal Cleaning | Quarterly | Apply dielectric grease after cleaning to prevent future corrosion |
| Specific Gravity Testing | Bi-annually | Track individual cell performance over time |
Electrical System Preservation
Critical but often overlooked maintenance includes:
- Controller cooling – Ensure ventilation paths are clear (common issue in enclosed utility carts)
- Wire harness inspections – Rodent damage causes 23% of unexplained electrical faults
- Moisture prevention – Silica gel packs in controller compartments combat humidity
Mechanical Longevity Strategies
Extend drivetrain life with these practices:
- Differential fluid changes every 2 years (often neglected in electric carts)
- Bearing repacking for lifted carts (every 500 hours of operation)
- Brake adjustment (mechanical brakes need seasonal readjustment)
Cost-Benefit Insight: Spending $150 annually on preventative maintenance typically saves $800+ in avoided major repairs over 5 years. Lithium battery conversions (while expensive upfront) reduce maintenance costs by 60% compared to lead-acid systems.
Environmental Note: Proper battery disposal prevents lead contamination – most dealers offer core exchange programs. Newer regenerative braking systems not only improve range but reduce brake dust pollution by 75%.
Future Trend: IoT-connected diagnostic systems are becoming standard on premium models, allowing real-time monitoring of all critical systems via smartphone apps – catching issues before they strand you.
Upgrade and Modification Considerations for Enhanced Reliability
When facing persistent mobility issues, strategic upgrades often provide more permanent solutions than repeated repairs. These enhancements address root causes while improving overall performance, but require careful system integration to avoid creating new problems.
High-Performance Electrical System Upgrades
For carts used in demanding conditions:
- HD Solenoids (like Curtis 586-HD) handle 400A+ for lifted carts with large tires
- 4-Gauge wiring kits reduce voltage drop in 48V+ systems by up to 40%
- Thermally protected controllers automatically reduce output before overheating
Installation Tip: Always match controller amp rating to motor specifications – overpowering can demagnetize motor fields over time.
Drivetrain Modifications for Heavy Use
Essential upgrades for work carts or hilly terrain:
| Component | Upgrade Benefit | Compatibility Note |
|---|---|---|
| Helical Cut Gears | Quieter operation, 30% longer lifespan | Requires matching differential case |
| Oil-Bathed Brakes | Eliminates brake dust contamination | Only for newer AC drive systems |
Advanced Battery Solutions
Beyond standard replacements:
- Lithium conversions (like Eco Battery 105Ah) provide 2-3x cycle life of lead-acid
- Smart battery monitors track individual cell health in real-time
- Active balancing systems automatically equalize charge across all cells
Integration Warning: Lithium systems require compatible chargers and often controller reprogramming. DIY installations void most manufacturer warranties without proper certification.
Future-Proofing: New CAN bus-compatible components allow for over-the-air updates and predictive maintenance alerts, though require professional installation for proper network integration.
Cost Analysis: While a full performance upgrade package averages $2,500-$3,500, it typically extends cart lifespan by 5-7 years and reduces annual maintenance costs by 60% compared to stock configurations.
System-Wide Optimization and Long-Term Performance Management
Achieving peak golf cart reliability requires understanding how all components interact as a complete system. This holistic approach prevents the most common pitfall – fixing one problem while unknowingly creating another.
Performance Balancing: Matching Components
Optimal system configuration follows these engineering principles:
| Component | Performance Factor | Ideal Match |
|---|---|---|
| Motor | Continuous Amp Draw | Controller rated 25% higher |
| Batteries | Peak Discharge Rate | 200% of controller max draw |
| Cables | Current Capacity | 150% of system peak amps |
Predictive Maintenance Schedule
Professional maintenance intervals based on usage:
- Every 50 hours: Check torque on all electrical connections
- Every 100 hours: Inspect motor brushes (DC systems) and bearing play
- Seasonally: Full system diagnostic scan and software updates
Risk Mitigation Strategies
Prevent catastrophic failures with these measures:
- Thermal monitoring – Install temperature sensors on controller heatsinks
- Current limiting – Program controllers to 90% of max rated output
- Moisture barriers – Apply conformal coating to vulnerable circuit boards
Validation Protocol: After any major repair or upgrade, conduct a 3-phase test:
1) Static electrical checks
2) Loaded dyno simulation (or steep hill test)
3) 5-mile mixed terrain road test
Quality Assurance Tip: Maintain a “health log” tracking voltage readings, error codes, and performance metrics over time. This data reveals degradation patterns before failures occur.
Future Outlook: Emerging AI diagnostic tools can now analyze sound patterns and vibration signatures to predict component failures weeks in advance, representing the next frontier in golf cart maintenance.
Final Thoughts: Getting Your Golf Cart Back on Course
From electrical gremlins to mechanical failures, we’ve explored the 8 most common reasons why a fully charged golf cart won’t move – and exactly how to diagnose each issue.
Remember that voltage readings alone don’t guarantee power delivery, and that systematic troubleshooting beats random part replacements.
Whether it’s a failing solenoid, controller issues, or hidden battery problems, you now have the professional-grade knowledge to identify and fix the problem.
Put this knowledge into action today: Start with the simplest tests (listen for solenoid clicks, check pedal engagement) before moving to advanced diagnostics. Your golf cart’s renewed performance is just a few methodical checks away.
Frequently Asked Questions About Golf Cart Electrical Issues
Why does my golf cart click but not move when fully charged?
The clicking sound typically indicates your solenoid is engaging, but power isn’t reaching the motor. This could be due to a failed controller (most common in modern carts), corroded high-current cables, or worn motor brushes.
First check for voltage at the controller’s output terminals when pressing the accelerator. If voltage is present but the cart won’t move, your motor likely needs servicing or replacement.
How can I test if my golf cart batteries are bad despite showing full charge?
Perform a load test with a proper battery tester (like the Schumacher BT-100) that applies a 100-amp load. Healthy 12V batteries should maintain at least 9.6V under load for 15 seconds.
Also check specific gravity in each cell if using flooded lead-acid batteries – variations over 0.050 between cells indicate sulfation problems.
What’s the difference between a golf cart not moving at all versus intermittent operation?
Complete failure usually indicates a broken circuit (failed solenoid, controller, or open connection). Intermittent operation suggests components overheating (common with failing controllers), loose wiring, or worn motor brushes.
For intermittent issues, monitor component temperatures during operation and check all high-current connections for proper torque (typically 8-10 ft-lbs for battery cables).
Can I replace just one bad battery in my golf cart’s battery pack?
Technically yes, but practically no. Mixing old and new batteries in series causes the new battery to overwork compensating for the older ones, drastically reducing its lifespan.
Always replace the entire set (all 4, 6, or 8 batteries depending on your system) and recycle the old ones properly through a battery retailer.
How do I know if my golf cart’s speed controller is failing?
Key symptoms include: sudden loss of power (especially uphill), error codes flashing on the dash, burning smells from the controller compartment, or the cart only working at partial speed. Advanced diagnosis requires checking throttle input signals and output voltage with a multimeter – proper voltage should increase smoothly with pedal depression.
What maintenance prevents most golf cart electrical failures?
Follow this quarterly checklist:
1) Clean and tighten all battery connections,
2) Check electrolyte levels in flooded batteries,
3) Inspect wiring for chafing or rodent damage,
4) Test solenoid operation,
5) Verify proper charger shut-off voltage (58.4V for 48V systems).
Annual professional inspections should include controller thermal imaging and motor brush measurements.
Why does my golf cart work fine cold but stops when warmed up?
This classic thermal failure pattern usually indicates:
1) Overheating controller (common in lifted carts),
2) Failing motor brushes expanding with heat, or
3) Battery terminal corrosion creating resistance that worsens with temperature.
Isolate by testing components when warm – a controller failing thermally will show erratic output voltage when hot but normal readings when cool.
Are lithium golf cart batteries worth the higher upfront cost?
For most users, yes. While costing 2-3x more initially, lithium batteries last 5-8 years versus 2-4 for lead-acid, provide more consistent power delivery, and require no maintenance.
They’re particularly valuable for hilly terrain (better voltage maintenance) and cold climates (superior low-temperature performance). Just ensure your charger and controller are lithium-compatible before upgrading.